TextAnnotationGraphs (TAG)
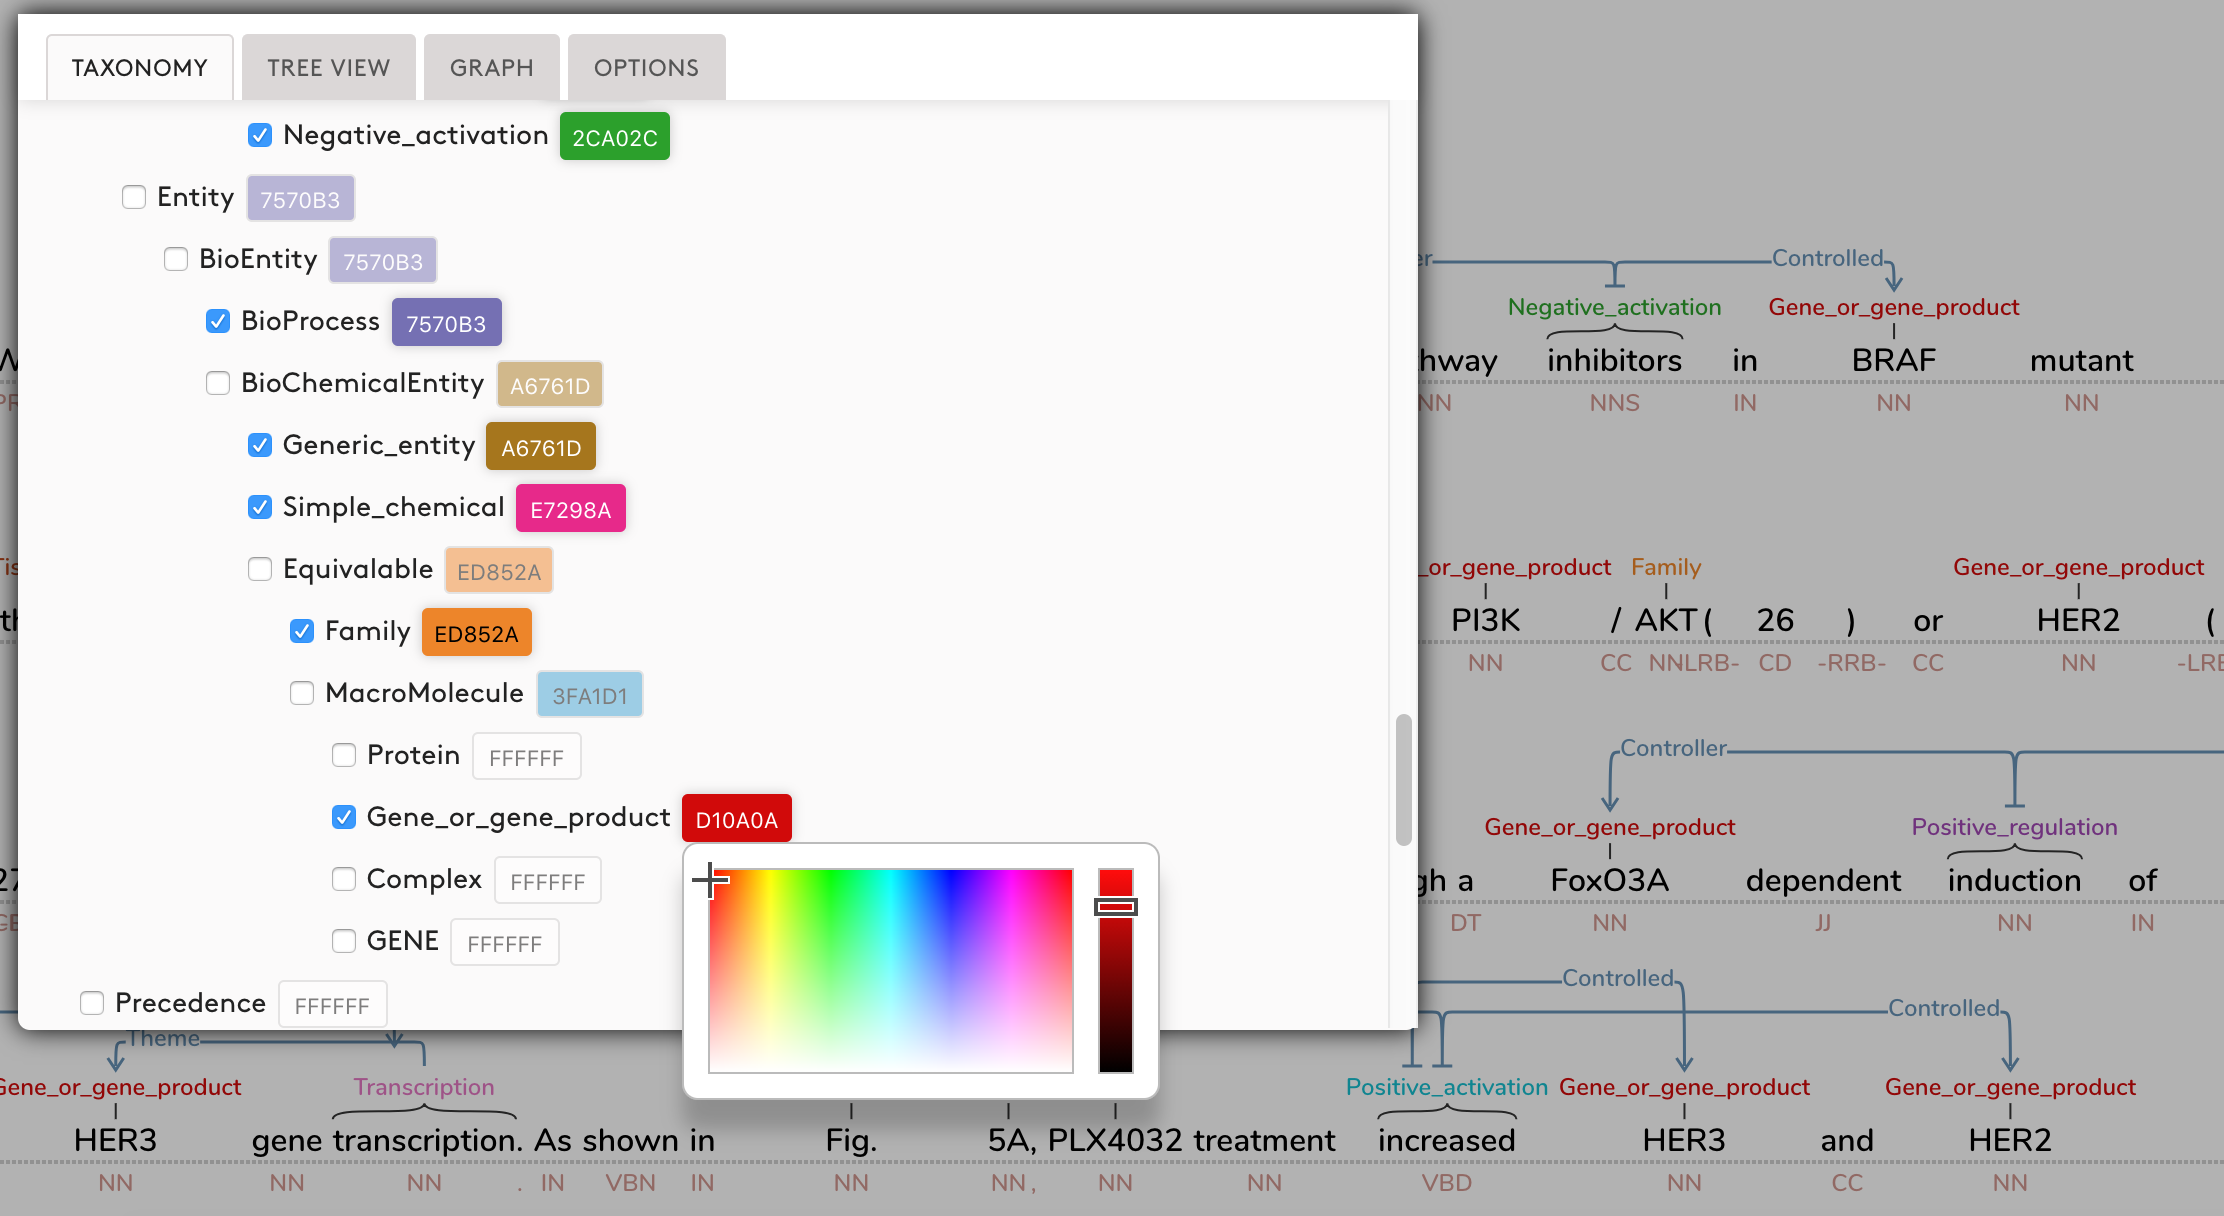
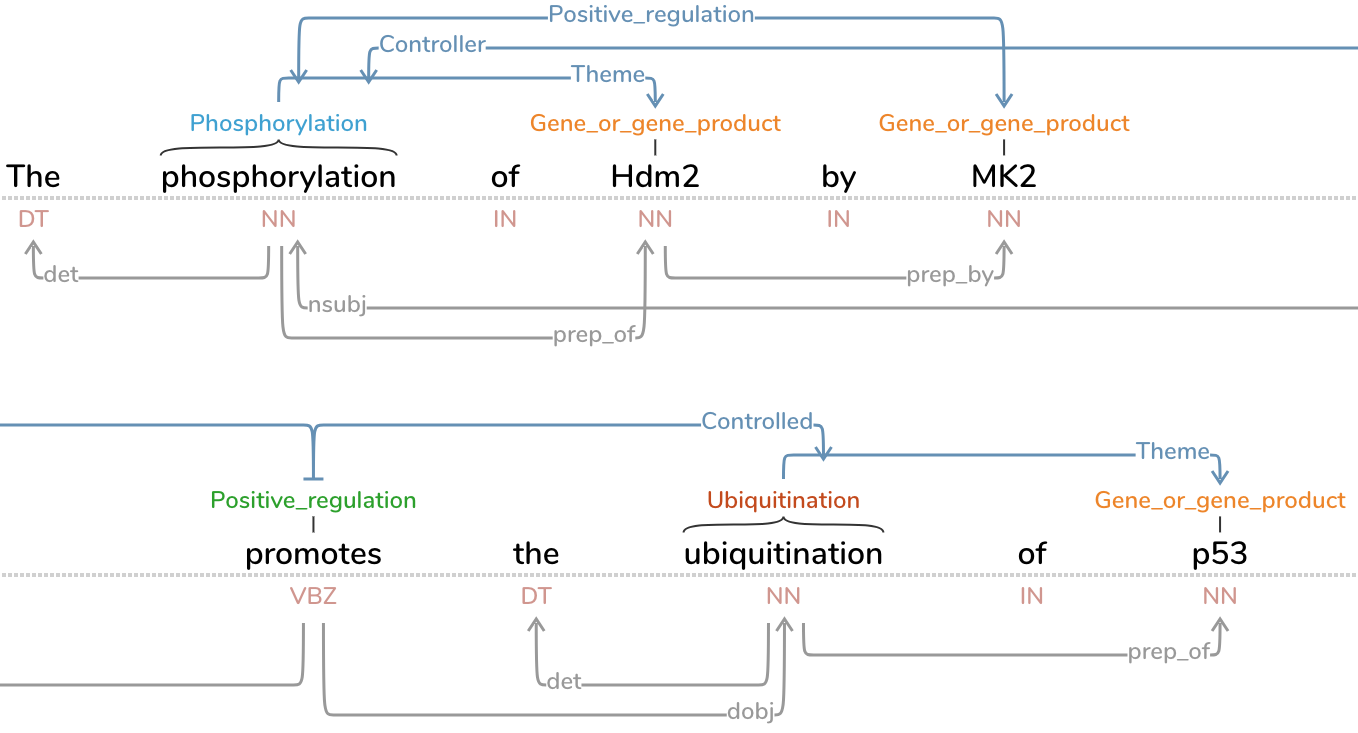
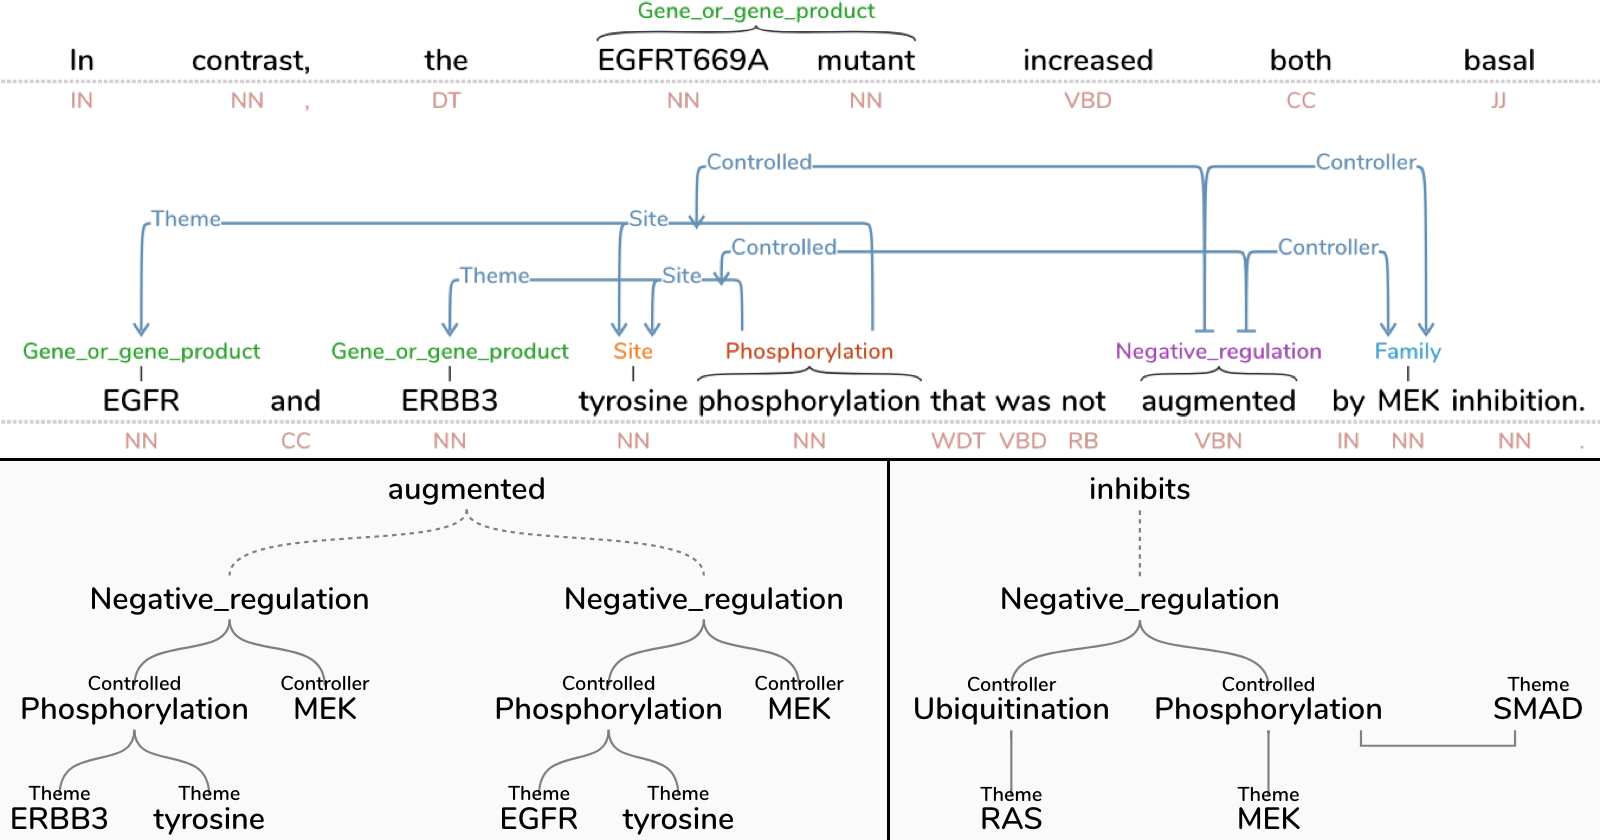
A modular annotation system that supports complex, interactive annotation graphs embedded on top of sequences of text. An additional view displays a subgraph of selected connections between words/phrases using an interactive network layout.


Development
TAG was developed by Angus Forbes (UC Santa Cruz) and Kristine Lee (University of Illinios at Chicago), in collaboration with Gus Hahn-Powell, Marco Antonio Valenzuela Escárcega, Zechy Wong, and Mihai Surdeanu (University of Arizona). Contact angus@ucsc.edu for more information.
Citing TAG
If you use TAG in your work, please use the following citation:
@inproceedings{TAG-2018,
    author = {Angus Forbes and Kristine Lee and Gus Hahn-Powell and Marco A. Valenzuela-Escárcega and Mihai Surdeanu},
    title = {Text Annotation Graphs: Annotating Complex Natural Language Phenomena},
    booktitle = {Proceedings of the Eleventh International Conference on Language Resources and Evaluation (LREC'18)},
    year = {2018},
    month = {May},
    date = {7-12},
    address = {Miyazaki, Japan},
    editor = {Sara Goggi and Hélène Mazo},
    publisher = {European Language Resources Association (ELRA)},
    language = {english}
}
Write-up
A paper describing TAG was accepted to LREC'18. A pre-print can be found at https://arxiv.org/abs/1711.00529
Installation
TAG can be built and installed using npm.
Via npm
npm install git+https://github.com/CreativeCodingLab/TextAnnotationGraphs.git
Usage
To use TAG with your own applications, first include the library in your script:
Browserify (CommonJS)
const TAG = require("text-annotation-graphs");
ES6
import TAG from "text-annotation-graphs";
Next, register one or more annotation format Parsers with the library. TAG comes with parsers for the BRAT and Odin annotation formats -- See the demo sources (demo/src/demo.js) and the Parsers readme (Parsers/README.md) for more information.
const OdinParser = require("text-annotation-graphs/Parsers/odin");
TAG.registerParser(new OdinParser(), "odin");
Then initialise the visualisation on an element, optionally specifying the initial data set to load and any overrides to the default options. For more details, consult the full API documentation.
const graph = TAG.tag({
  container: $container,
  data: {...},
  format: "odin",
  options: {...}
});
Development
Tasks are managed via npm scripts and the runjs build tool. The most commonly used tasks are listed in package.json, and details for the various sub-tasks can be found in tasksfile.js.
Demo
See the live demo here.
After cloning the repository and installing the project dependencies via npm install, you can run the interactive demo using npm run demo and directing your browser to localhost:8080.
To run the demo on a different port, set the PORT environmental variable. For example, running PORT=9000 npm run demo will start the demo server on localhost:9000 instead.
Building the source
TAG is written in ES6, and uses Sass for its styles.
Assuming you've cloned the repository and installed its dependencies, run npm run build to transpile the source to ES2015 and generate the library bundles (dist/tag) and documentation (docs).
To rebuild the sources for the demo, run npm run demo-build.
Live monitoring of changes
For convenience, you can monitor changes to the library's sources (in the src folder) with the following npm task, which will regenerate the files in the dist/tag folder:
npm run watch
If you are experimenting with the demo and would like to monitor changes to the demo sources (in the demo folder), use the following npm task instead:
npm run demo-watch
The demo-watch task will also catch changes to the library sources and rebuild the demo bundles, but it will not directly rebuild the library bundles in dist/tag, so be sure to run npm run build separately if you intend to redistribute/repackage your changes to the library sources.
Generating documentation
TAG uses JSDoc to generate its documentation. By default, the documentation is generated using the template in src/jsdoc-template (adapted from the Braintree JSDoc Template) and stored in the docs folder.
To regenerate the documentation, use the following npm task:
npm run generate-docs